A hands-on walkthrough of PromptLayer
This is a hands-on look at PromptLayer, one of the products we compare ourselves against. Instead of reading their docs, we logged into a real hosted PromptLayer account and did the same four things we do on every platform in this series: create a prompt, version it, run it and inspect the trace, and see what evaluation looks like. This post is just the PromptLayer leg — the main comparison post pulls the findings from all platforms together.
1. Logging in and finding the workspace
PromptLayer's dashboard opens straight to a home screen listing recent playground sessions and saved prompt items for the workspace ("AcruxCore Research", on a Team Trial Plan).
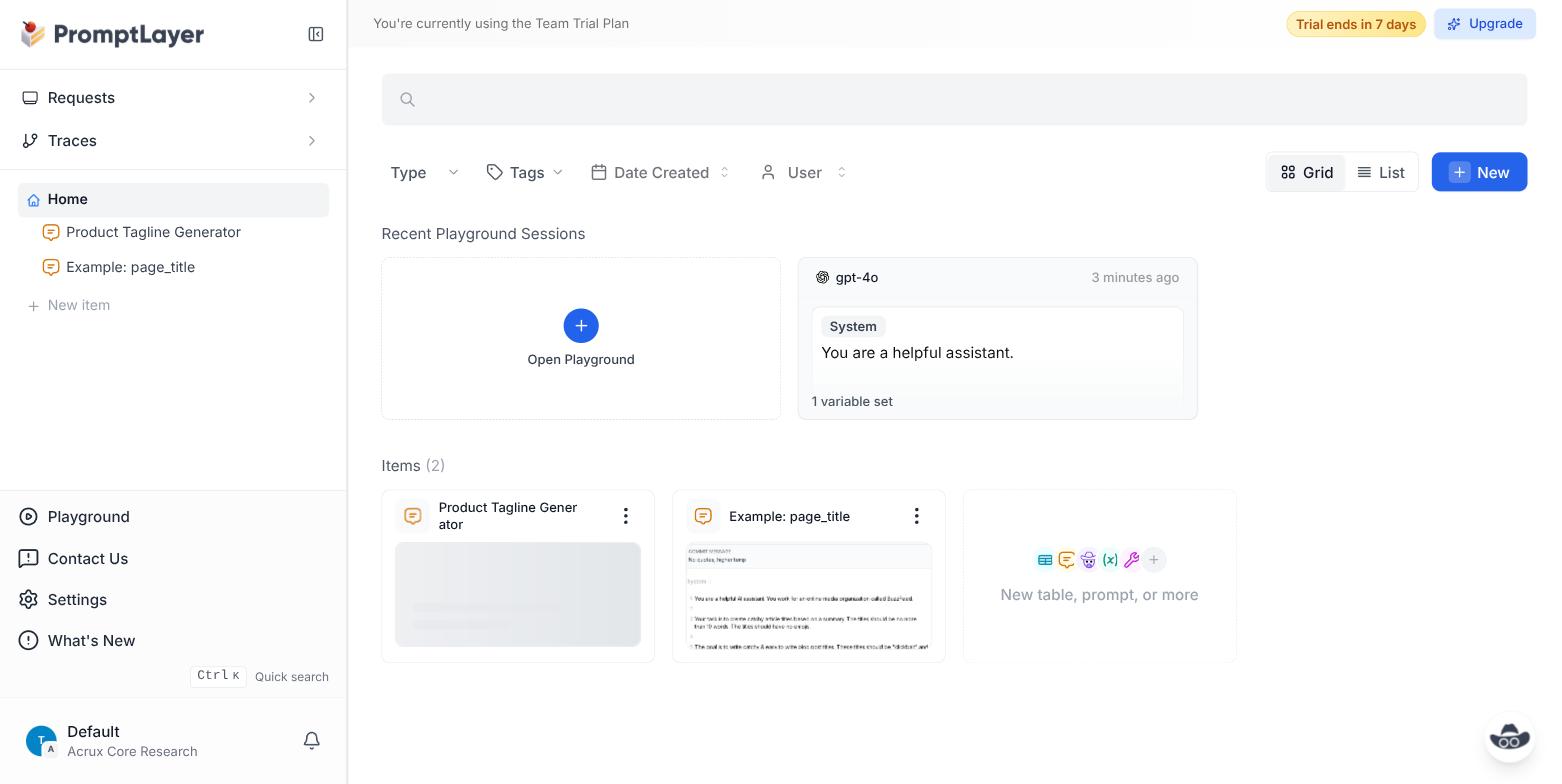
The New menu in the top right is the entry point for everything: prompts, interactive tables, workflows, tools, snippets, and — notably — an A/B Test item, which turns out to matter later.
2. Creating and running a prompt
Creating a prompt opens a playground-style editor immediately: a system message box, a user message
box, and a model picker (defaulted to gpt-4o). Typing {{city}} in a message is automatically
recognized as a template variable and rendered as a highlighted chip — no separate "mark this as a
variable" step.
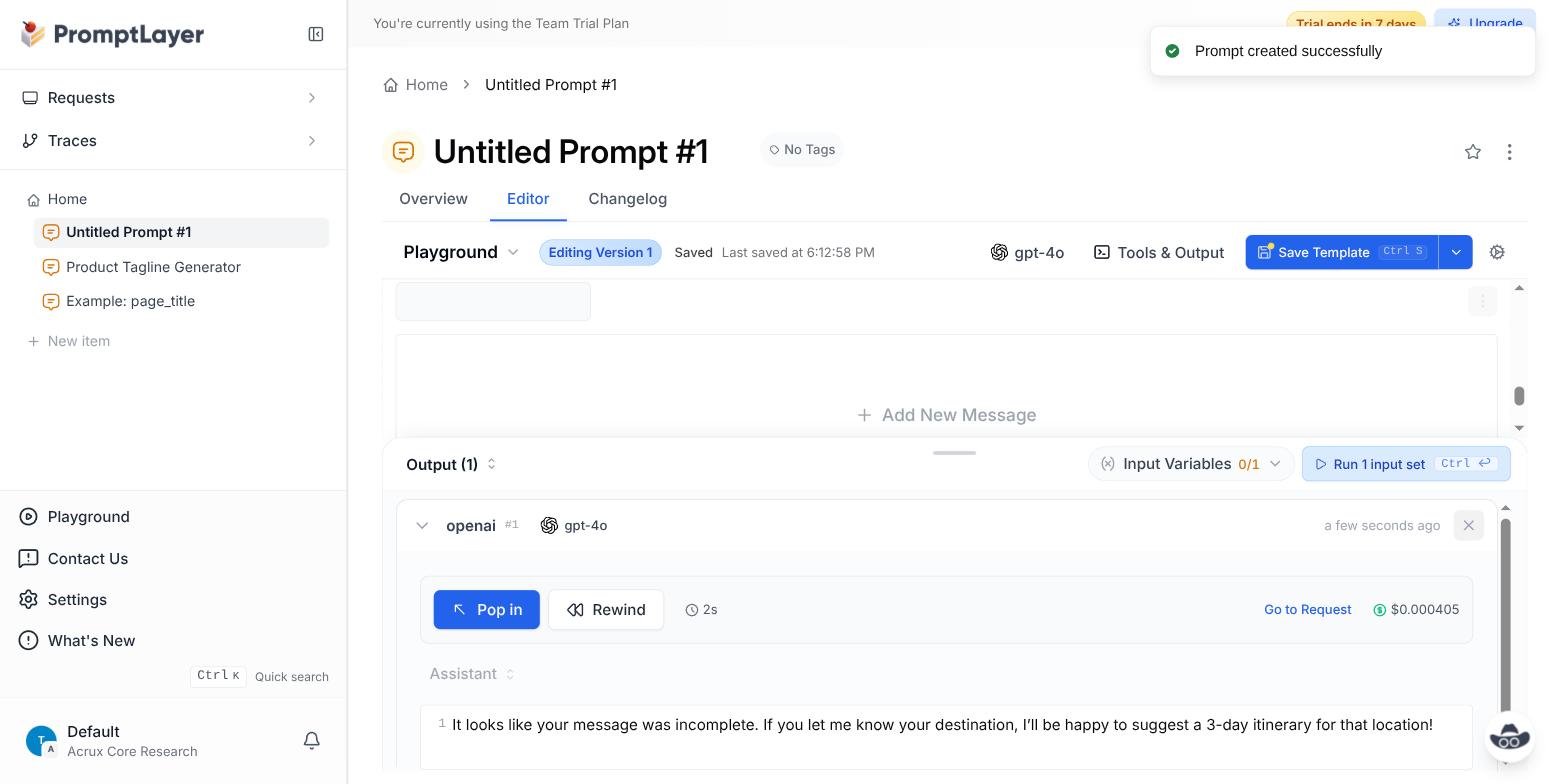
Running the prompt (via the Run button, without filling in the variable) produced a real output in about 2 seconds for $0.000405 — cost and latency are shown inline on the output card, with a Go to Request link straight into the log entry for that call.
3. Saving a new version
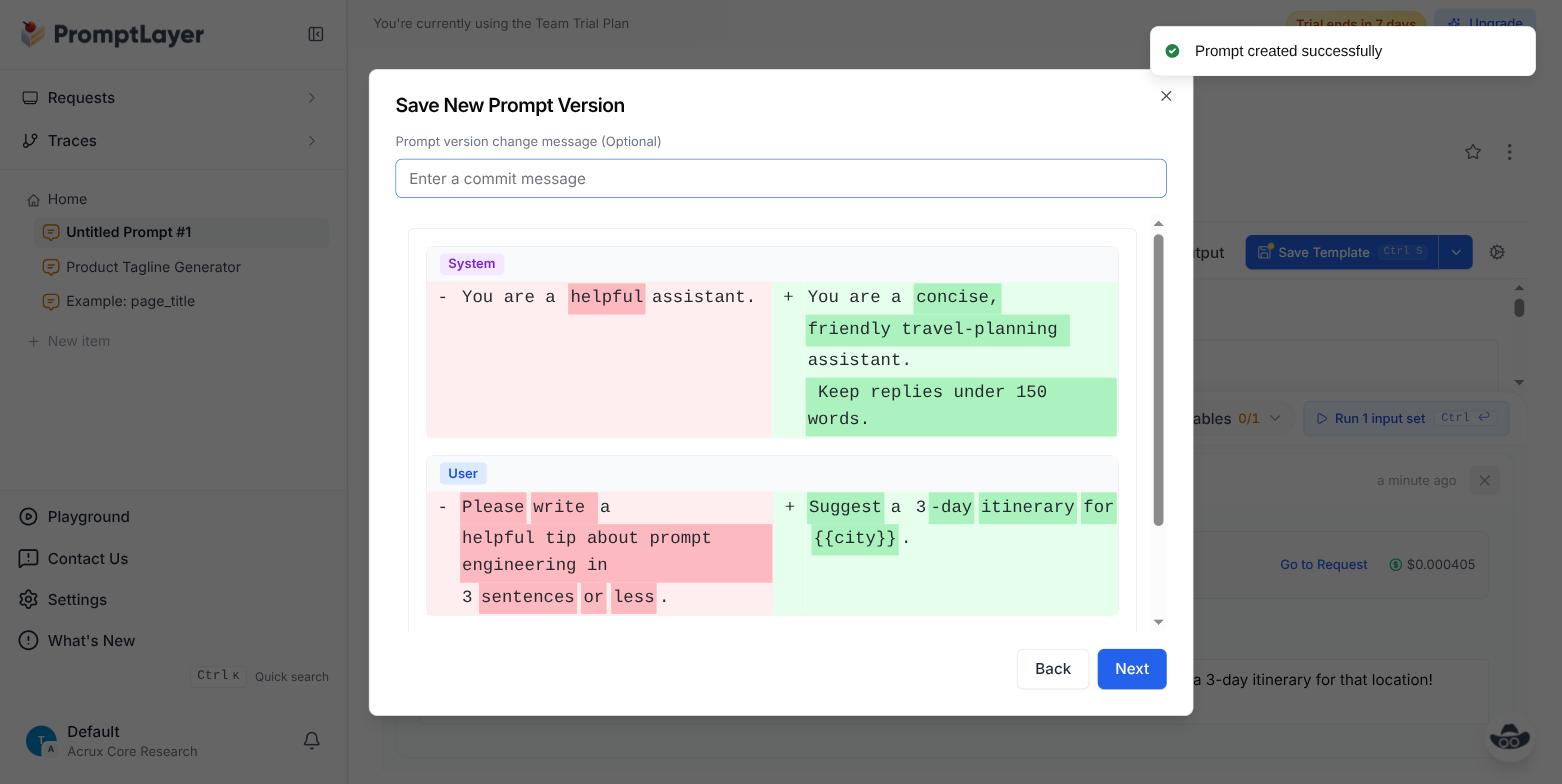
Editing the prompt and clicking Save Template opens a Save New Prompt Version dialog that shows a real diff of what changed — line-level additions and removals, colored like a git diff — plus an optional commit message field.
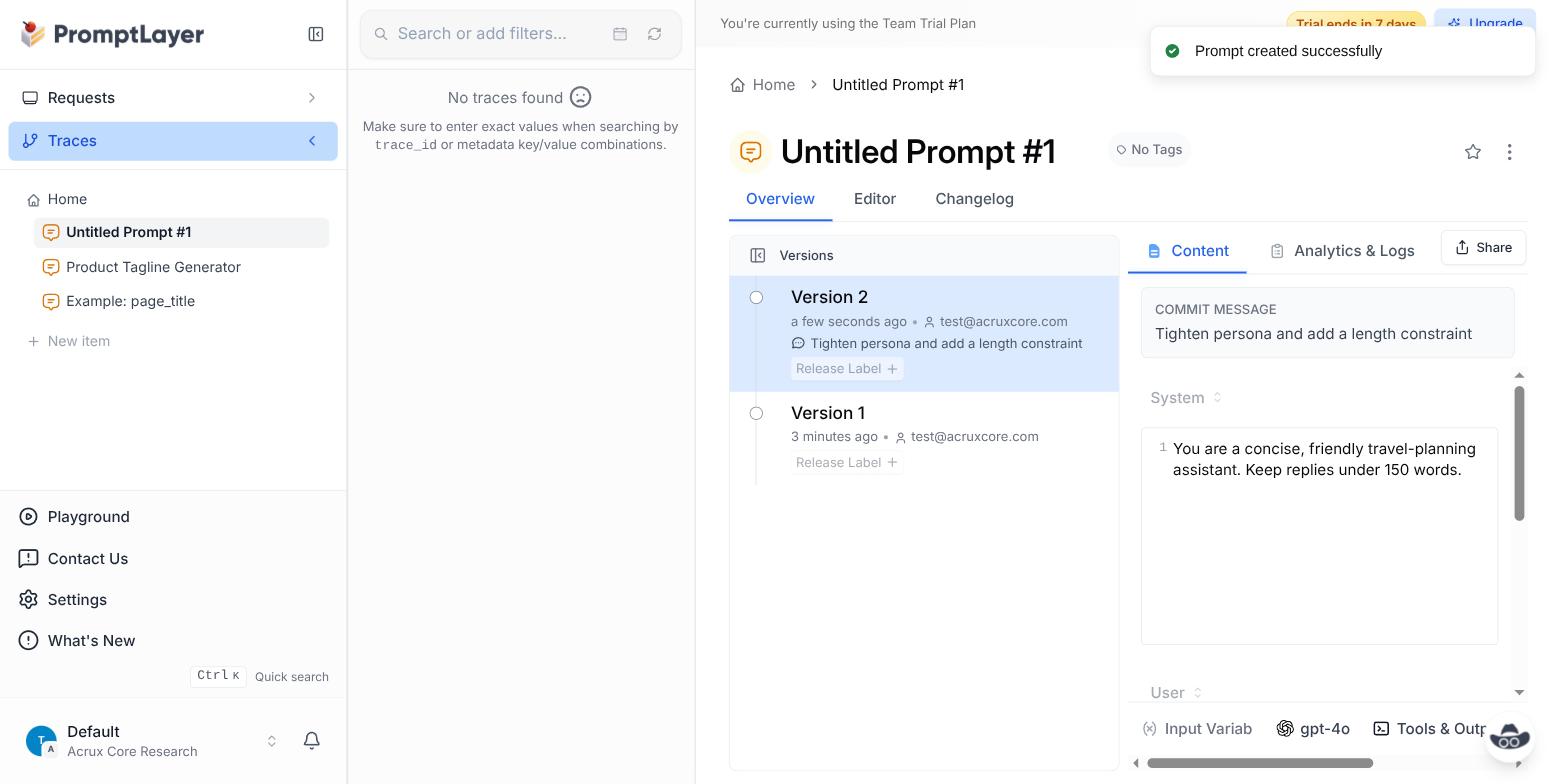
After saving, the prompt's Overview tab lists every version with its commit message, author, and
timestamp, and lets you attach a Release Label (e.g. production) to any version — the same
alias-over-version idea AcruxCore uses, under a different name.
4. Inspecting the trace/request view
This is where PromptLayer's shape becomes clear. There are two separate sidebar sections:
Traces and Requests. Traces — PromptLayer's span-based, multi-step view — came back empty
for our playground run; traces need explicit trace_id/span instrumentation via the SDK, they
aren't created automatically just by running a prompt in the UI.
What did get logged automatically is a Request: a flat, single-call record. Opening it shows the model, latency (923ms), cost, input/output token counts, tags, and the exact chat turn — but no nested steps, because a single LLM call has none to show.
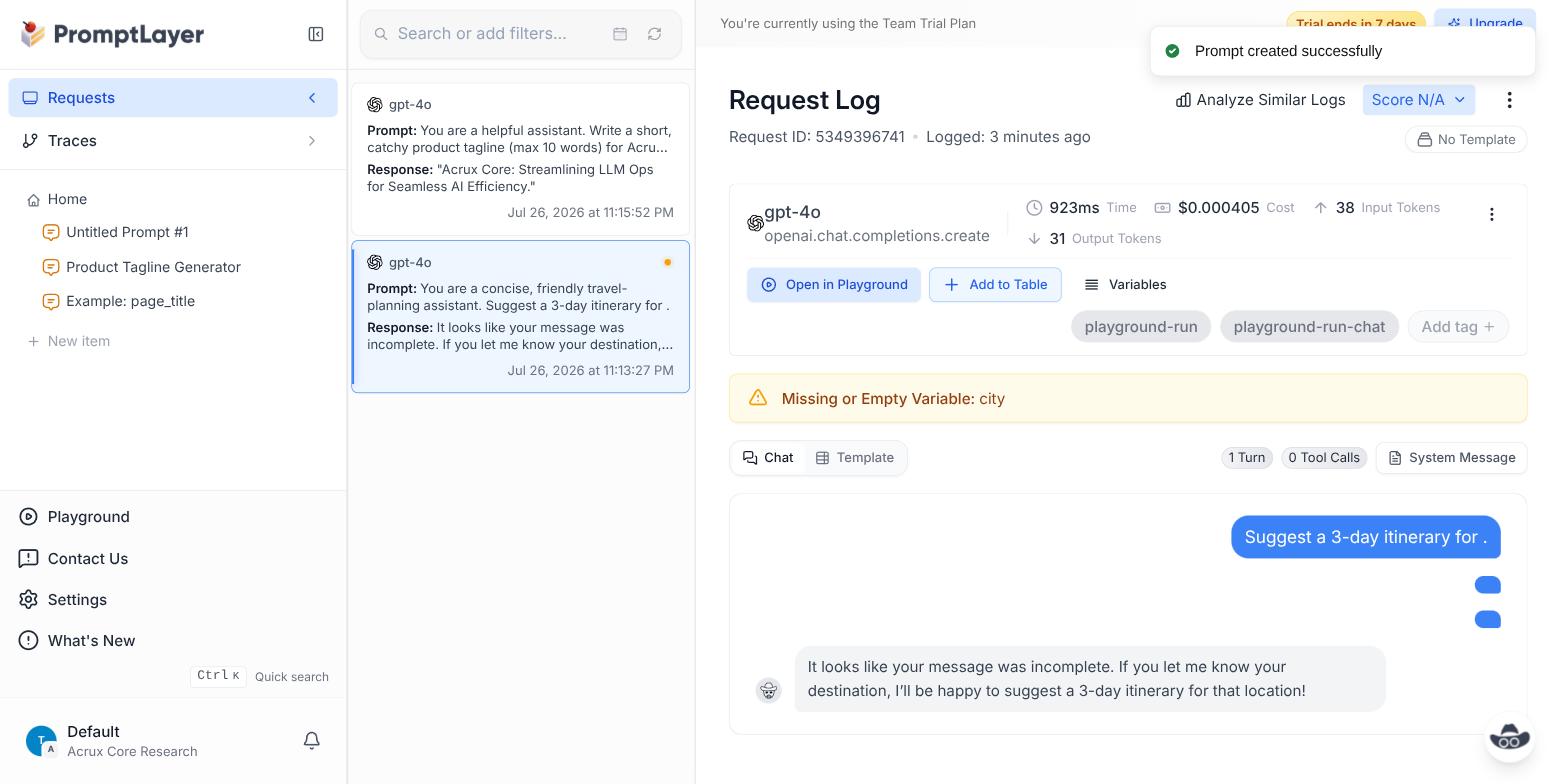
So: is it span-based or proxy-based? Neither term fits exactly. PromptLayer doesn't sit in front of your model calls as a routing proxy the way a gateway does — you call the model yourself and then log the result to PromptLayer via their SDK. But what you get back by default is a flat per-call log, not an automatic multi-step trace. Multi-step tracing exists as an opt-in, separate feature, not the default behavior of "run a prompt."
5. Evaluation
PromptLayer doesn't have a LangSmith/Langfuse-style "create a dataset, run an experiment across a grid" flow. Its closest equivalent is the A/B Test feature: pick a Release Label attached to a prompt template, and it builds an experiment that compares traffic between labeled versions.
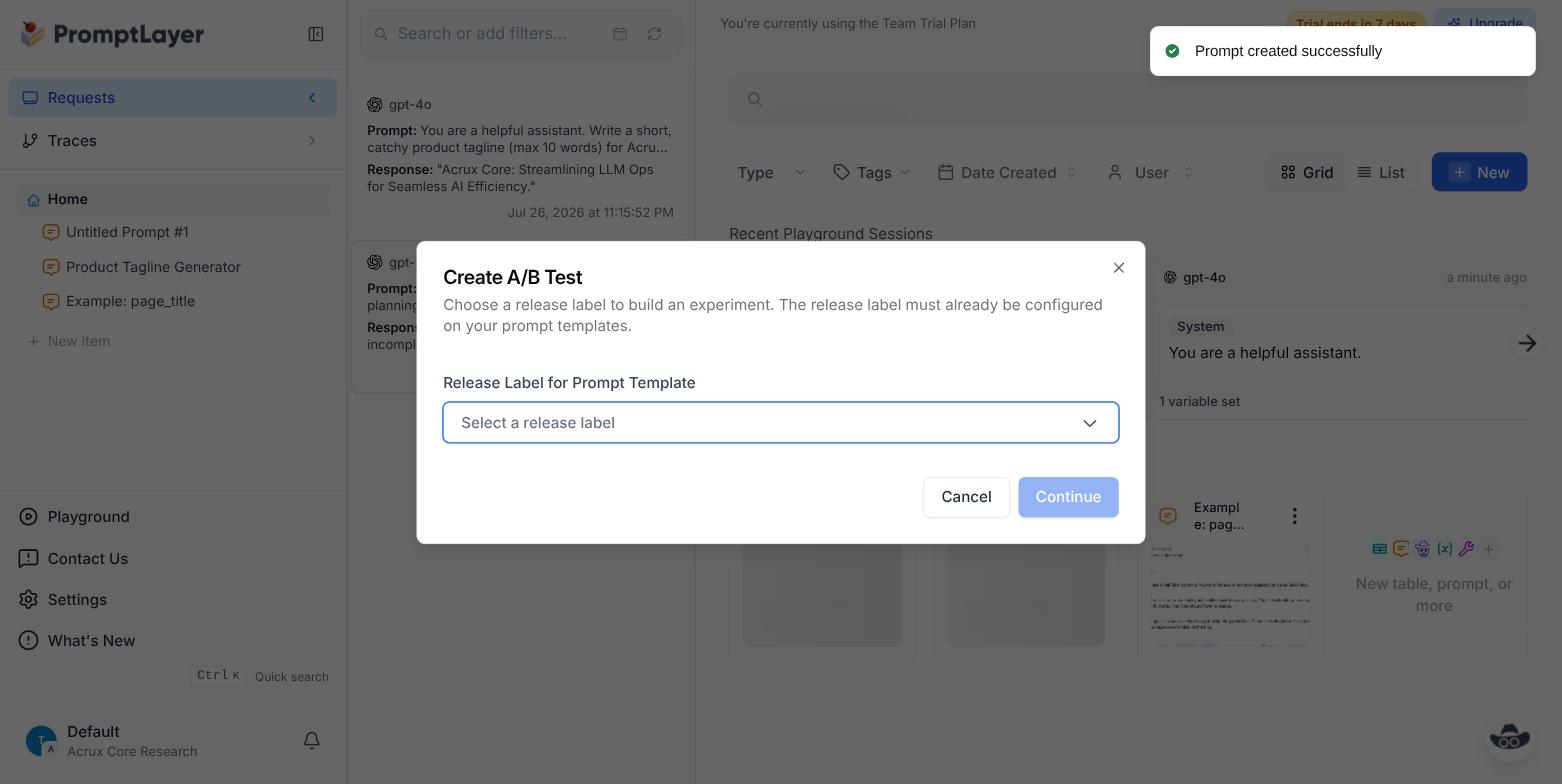
This is a live-traffic A/B test between two named releases, not an offline batch eval against a fixed example set. We didn't have two release labels configured to complete a full test, but the entry point and its requirements are visible above. Individual requests can also be manually scored (a "Score N/A" control sits on every Request Log page), which is closer to spot-checking than systematic evaluation.
Update: with a model key configured
The steps above were done before this account had an OpenAI key configured anywhere, so several things were untested. After adding a key under Settings → Model API Keys → OpenAI, we went back and re-ran the same prompt live.
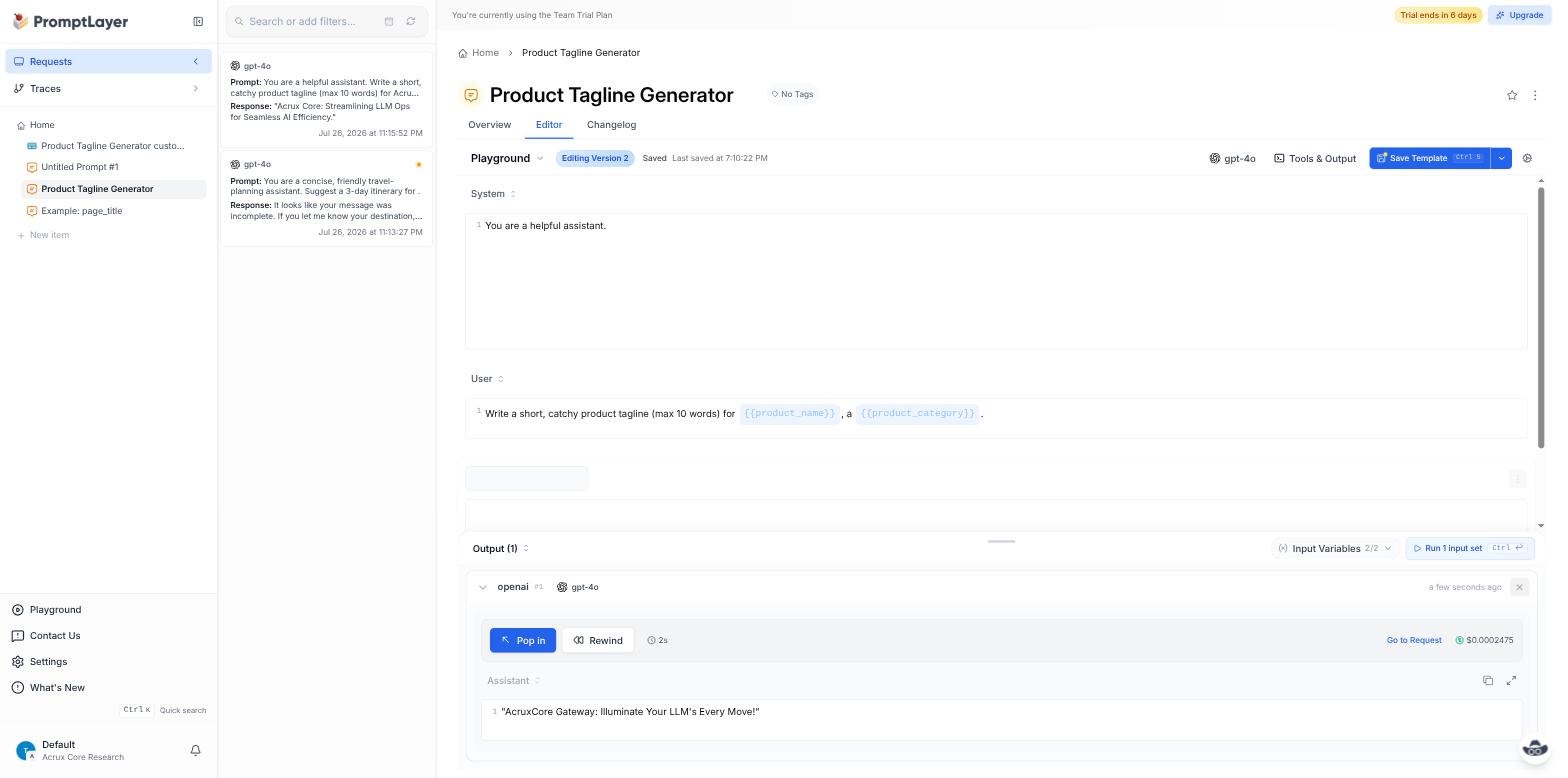
Running the Product Tagline Generator prompt with both variables filled in (product_name: AcruxCore, product_category: SaaS platform) produced a real completion in under 2 seconds for
$0.0002475 (43 input / 14 output tokens):
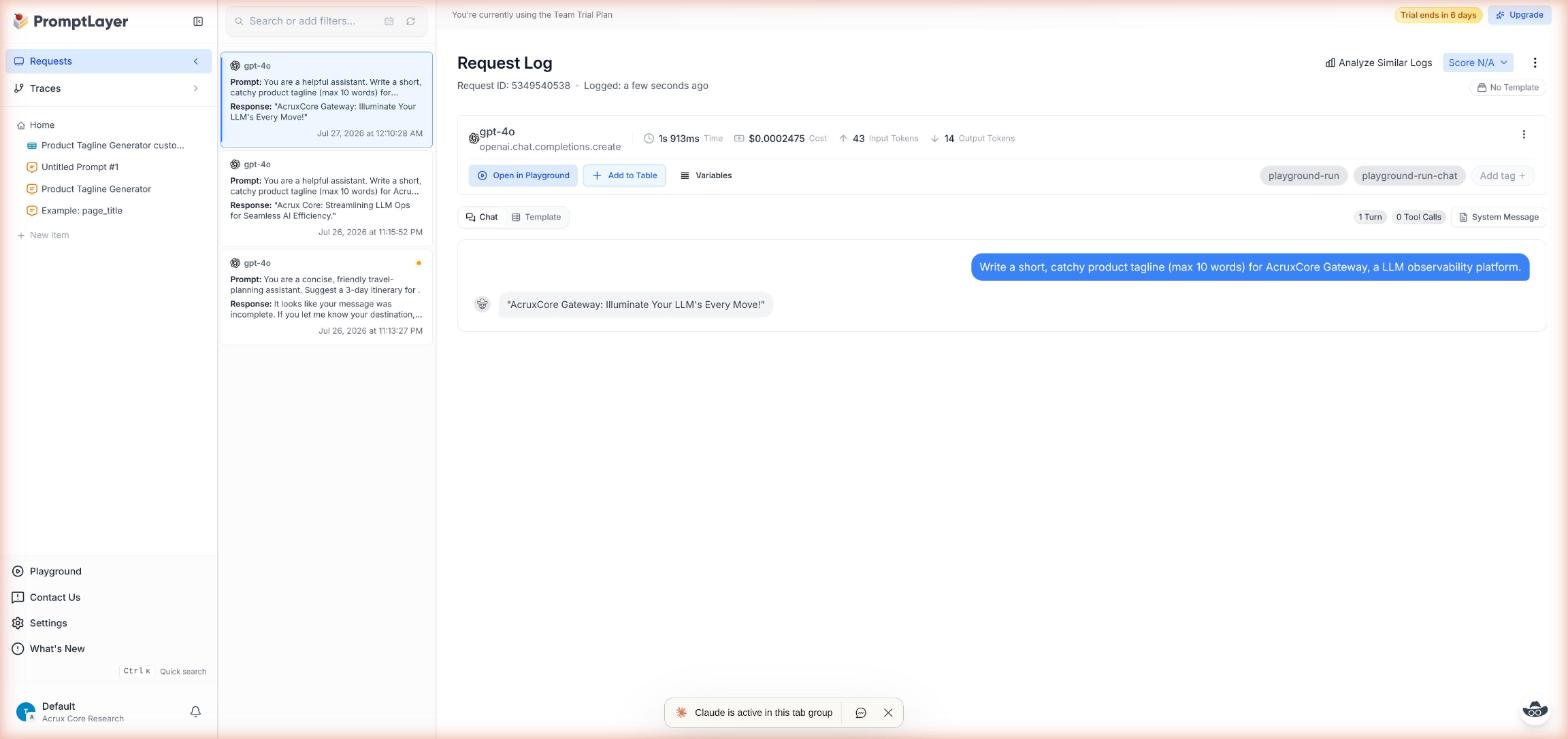
That request immediately showed up in the Request Log with full detail — model, latency, cost, and token counts, same as before but now for output we generated ourselves:
We also re-checked Traces after this run. It's still empty:
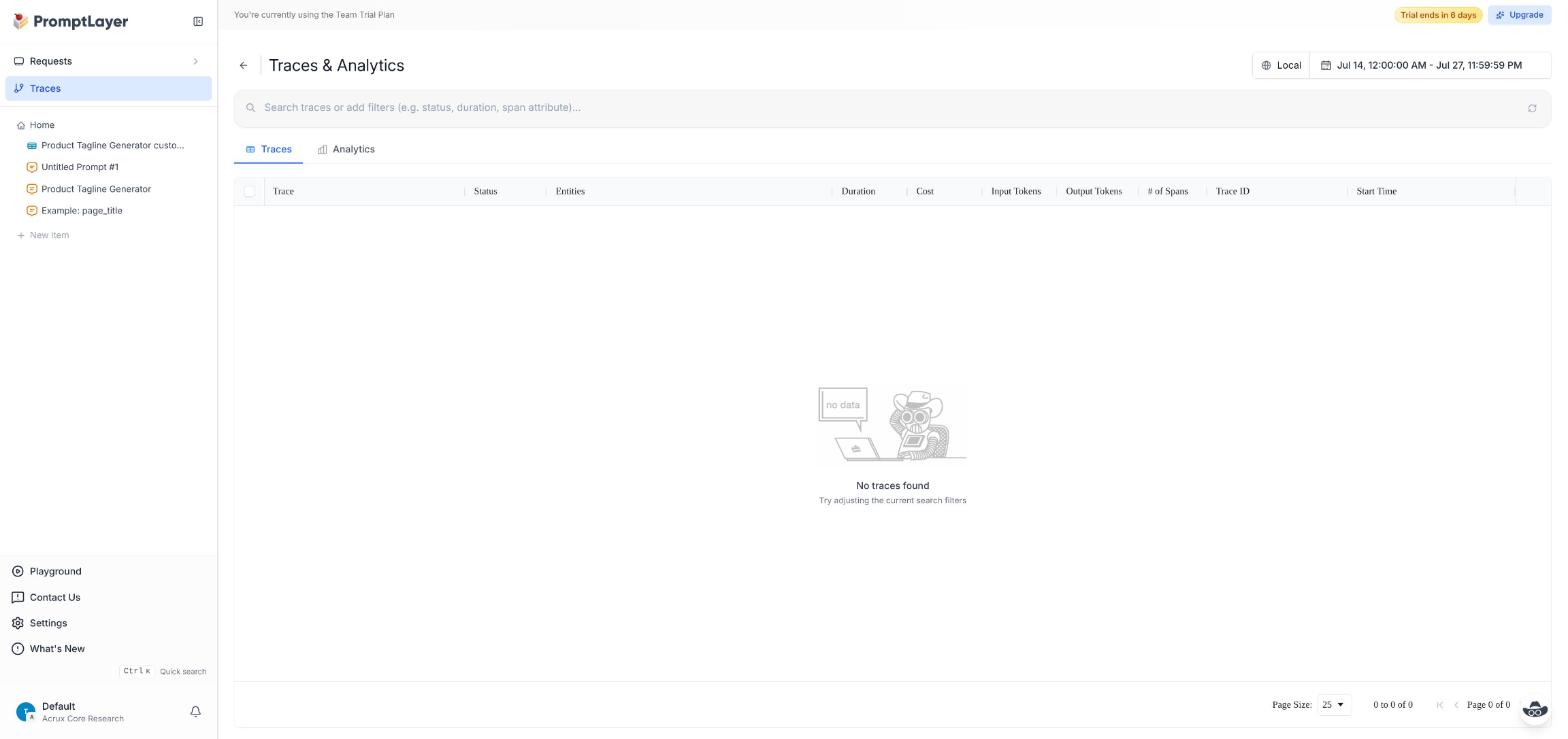
This confirms the finding above: having a model key configured unlocks running prompts, but Traces stays a separate, opt-in, SDK-instrumented feature — it's not populated just by using the UI, no matter how many live calls you make through it.
The bigger discovery: the Evaluate button on a prompt's Overview page (easy to miss — it's not
under the A/B Test flow we found before) opens a real dataset-style tool with presets for Model
comparison, Ground truth check, Structure check, and a blank Custom prompt table. We
ran Model comparison — one input row, two models (gpt-4o and gpt-4o-mini) — and it built a
live spreadsheet-style comparison table, calling both models for real and showing each output side by
side with "lowest cost" and "lowest latency" columns:
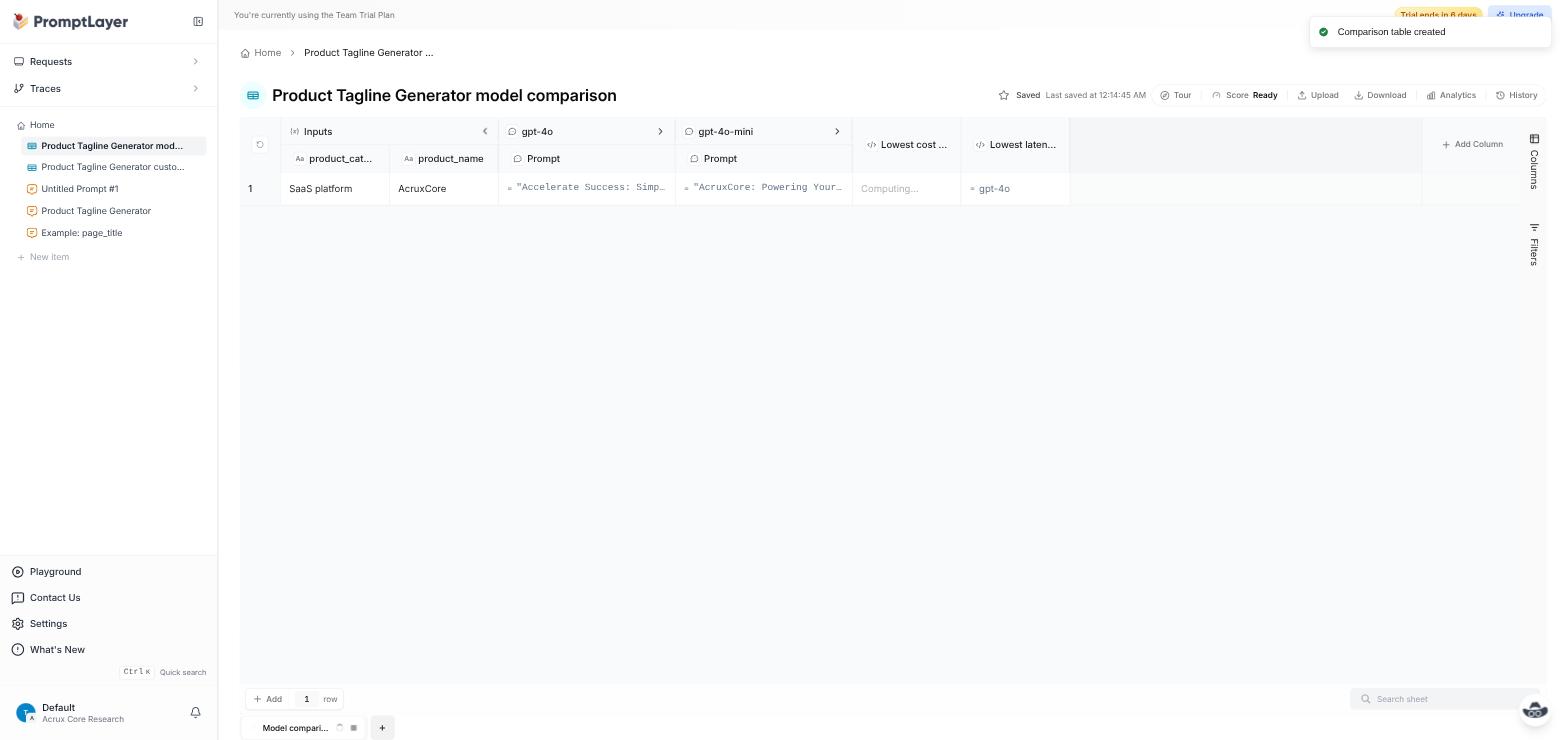
This changes the evaluation picture from what section 5 above found: PromptLayer does have a genuine grid-style eval tool, it's just organized around ad-hoc comparison tables rather than a persistent "dataset" object you build up over time and reuse across experiments the way LangSmith or Langfuse do. The release-label A/B test from before is a second, separate eval path (live traffic between two named releases), and this table-based comparison is a third (offline, one-off grids you build yourself). Between the two, PromptLayer actually covers more eval ground than section 5 originally gave it credit for.
Doing this from code
Everything above was done by clicking around the dashboard. PromptLayer also ships a Python (and JS) SDK that wraps the OpenAI client, so the same call can be made from a script instead — closer to how you'd actually use it from an application. We generated a scoped PromptLayer API key under Settings → PromptLayer API Keys and ran this:
import os

from promptlayer import PromptLayer

pl_client = PromptLayer(api_key=os.environ["PROMPTLAYER_API_KEY"])
openai_client = pl_client.openai.OpenAI(api_key=os.environ["OPENAI_API_KEY"])

response = openai_client.chat.completions.create(
    model="gpt-4o-mini",
    messages=[
        {"role": "user", "content": "Explain prompt versioning in one sentence."}
    ],
    pl_tags=["acruxcore-sdk-demo"],
)

print(response.choices[0].message.content)
Real output from running it:
Prompt versioning refers to the practice of creating and managing different iterations of a prompt to track changes, enhance performance, or address specific user needs in generative models.
The pattern is: keep using the normal OpenAI client interface, just get it from pl_client.openai
instead of importing openai directly — PromptLayer logs the call transparently on the way through.
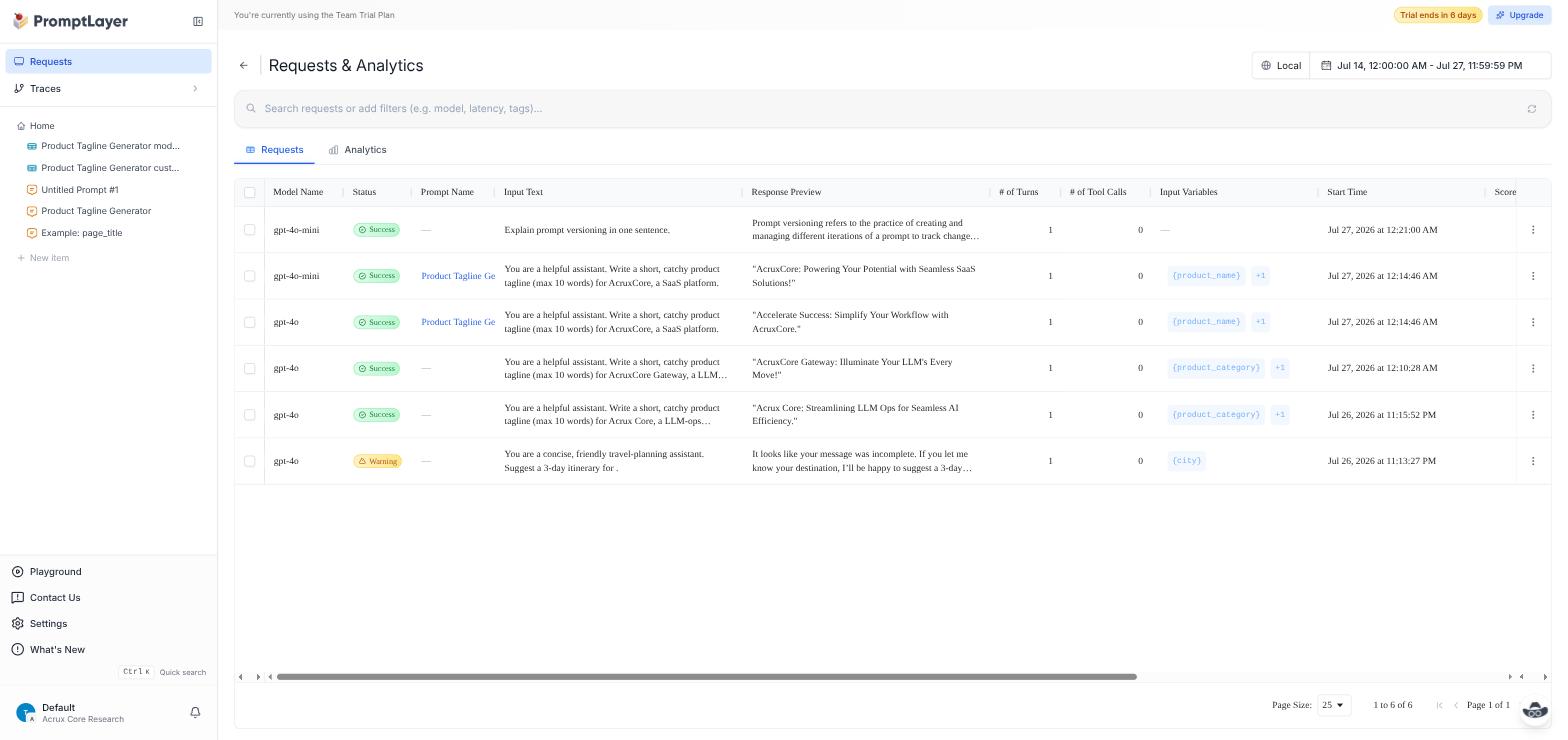
No decorator, no wrapping the call in a context manager. This request appeared in the Request Log
immediately after running the script, right alongside the ones we made by clicking "Run" in the
dashboard:
One thing worth noting: this call didn't go through a saved prompt template — it's a raw chat
completion, just logged. To get the versioning/alias benefits from section 3, you'd fetch the
template via pl_client.templates.get(...) first and feed its rendered messages into the same
chat.completions.create call.
What's unique to PromptLayer
- Release-label A/B testing on live traffic, rather than dataset-based offline experiments — useful if you want to compare two prompt versions on real production traffic rather than a fixed test set.
- Automatic variable detection in the editor — typing
{{name}}anywhere in a message instantly becomes a first-class template variable with no separate declaration step. - A visible, git-style diff on every prompt version save, before you even commit — you see exactly what changed, line by line, with an optional commit message, right in the save dialog.
- Traces and Requests are deliberately separate concepts — a flat per-call log is the default, and multi-step tracing is something you opt into, rather than the other way around.
- A live, ad-hoc model-comparison table — the Evaluate button builds a real spreadsheet that calls multiple models on the same input row and shows cost/latency/output side by side, without first requiring a saved, persistent dataset object.
PromptLayer vs AcruxCore
| Feature | PromptLayer | AcruxCore |
|---|---|---|
| Prompt versioning | Visible, git-style diff on every version save, before you even commit | Standing Diff tab, plus alias-based promotion with no redeploy |
| Variables | Auto-detects {{variable}} syntax in the editor, no separate declaration step | Validates required variables at render time, errors clearly if one's missing |
| Gateway | No request-routing layer — call providers yourself through their SDK wrapper, it logs the call | Gateway routes every provider call itself — one audited, cost-visible path |
| Tracing | Multi-step tracing is a separate, opt-in SDK feature; default is a flat per-call log | Automatic the moment a call goes through the gateway |
| Evaluation | Live, ad-hoc model-comparison tables and release-label A/B tests on live traffic | Datasets and experiments persist and build up over time, tied to real production feedback |
| Hosting & pricing | Seat-based trial plan | Open source and self-hostable, free in beta |
Want to see the same loop on AcruxCore? The Quickstart gets you from sign-up to a traced, gateway-routed call in about ten minutes.