Self-host AcruxCore with Docker
AcruxCore publishes three prebuilt images on Docker Hub. This guide runs them with Docker Compose, first on your own machine and then on a server. You do not need to clone the repository or build anything.
You need Docker with the Compose plugin (docker compose, not the older
docker-compose). On the first start, the three AcruxCore images download about 300 MB.
What runs
A self-hosted AcruxCore is five containers:
| Container | Image | What it does |
|---|---|---|
api | acruxcore/api | The API and the gateway. It applies database migrations each time it starts. |
worker | acruxcore/worker | Background jobs: evaluation runs, email and the weekly digest. |
web | acruxcore/web | The dashboard, served by nginx. It forwards /api/ to the api container. |
postgres | postgres:16-alpine | Every prompt, tool, trace and account. |
redis | redis:7-alpine | The job queue between the API and the worker. |
The hosted AcruxCore at acruxcore.com runs these same images.
Try it on your machine
1. Start the stack
Download the local Compose file and start it:
mkdir acruxcore && cd acruxcore
curl -O https://raw.githubusercontent.com/AcruxCore/AcruxCore/main/docker-compose.local.yml
docker compose -f docker-compose.local.yml up -d --wait
--wait returns when every container reports healthy. On our machine that took 13
seconds after the download.
This file is for a trial on your own machine. Every secret in it has a fixed default value, and email is turned off. Do not expose it to a network.
The dashboard is at http://localhost:8080, and the API is at
http://localhost:3001/api/v1. If one of those ports is taken, create a .env file
next to the Compose file and choose others:
WEB_PORT=8097
API_PORT=3097
Then run the same up command again.
2. Create the owner account
A new instance has no users. The API prints a one-time link that creates the first account, and that account owns the instance. Read it from the API logs:
docker compose -f docker-compose.local.yml logs api | grep first-run
http://localhost:8080/first-run?token=MTc5NDI4…
Open the link, then enter your name, email and a password.
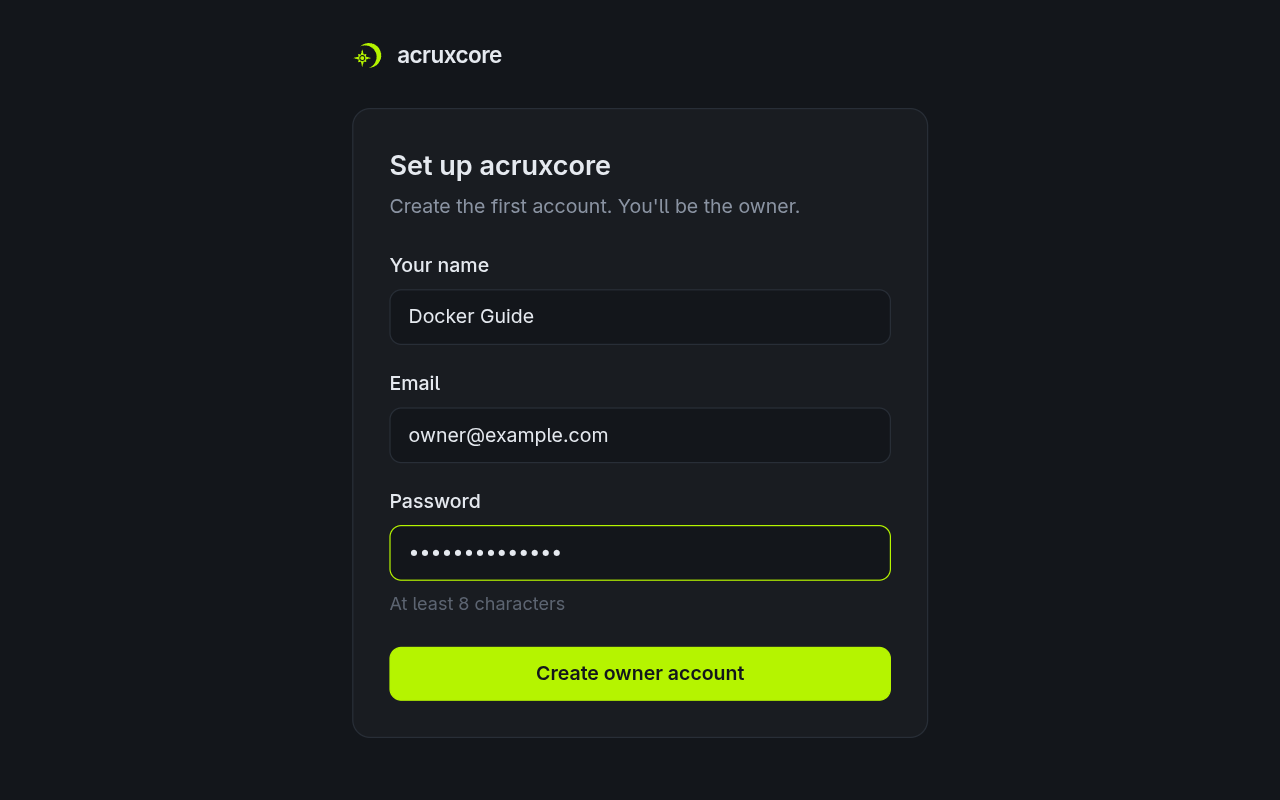
The link works once and expires after 60 minutes. Restart the api container to
print a new one. Other people join later through
team invites.
3. Make your first gateway call
From here on, a self-hosted instance works like the hosted one. Follow the Quickstart from step 2, and set the base URL to your own API:
export ACRUXCORE_BASE_URL="http://localhost:3001/api/v1"
export ACRUXCORE_API_KEY="<the key from Account & keys>"
The SDKs read the same two variables. For example, with an OpenAI credential and a
model registered under the public name gpt-6-luna, this call goes through your own
gateway:
curl "$ACRUXCORE_BASE_URL/gateway/chat/completions" \
  -H "Authorization: Bearer $ACRUXCORE_API_KEY" \
  -H "Content-Type: application/json" \
  -d '{"model":"gpt-6-luna","reasoning_effort":"none","messages":[{"role":"user","content":"Say hello in one short sentence."}]}'
{"id":"chatcmpl-EiWUkG48S2f2tqAkuRmmuXMWHHlyB","model":"gpt-6-luna","object":"chat.completion","created":1794280050,"choices":[{"index":0,"message":{"role":"assistant","content":"Hello, how can I help?"},"finish_reason":"stop"}],"usage":{"prompt_tokens":13,"completion_tokens":10,"total_tokens":23}}
The call is also recorded as a trace, which you can open under Traces in the dashboard.
Stop it
docker compose -f docker-compose.local.yml down      # keeps your data
docker compose -f docker-compose.local.yml down -v   # also deletes the database
Run it on a server
A server uses the other Compose file, docker-compose.yml. It differs from the local
file in four ways:
- You bring your own Postgres. A managed service such as RDS or Neon works, and so does a Postgres container you run yourself.
- Every secret is required, and the API refuses to start without them.
NODE_ENVisproduction, so sessions and email behave as they do on acruxcore.com.- No container publishes a public port. You put a reverse proxy in front of
web.
1. Download the files
mkdir acruxcore && cd acruxcore
curl -O https://raw.githubusercontent.com/AcruxCore/AcruxCore/main/docker-compose.yml
curl -o .env https://raw.githubusercontent.com/AcruxCore/AcruxCore/main/.env.docker.example
2. Fill in .env
Generate each secret with a separate run of openssl rand -base64 32. Then set at
least these values:
| Variable | Value |
|---|---|
DATABASE_URL | The Postgres connection string the API uses at runtime. |
DIRECT_URL | A direct Postgres connection for migrations. If DATABASE_URL goes through a pooler such as PgBouncer, this one must not. Otherwise use the same value. |
GATEWAY_ENCRYPTION_KEY | Encrypts the provider keys you store. If you lose it, every stored provider key becomes unreadable, so back it up. |
BETTER_AUTH_SECRET | Signs session cookies. Changing it signs everyone out. |
EMAIL_UNSUBSCRIBE_SECRET | Signs the unsubscribe link in every email. |
APP_URL | The URL people open in the browser, such as https://acruxcore.example.com. Links in emails use it, and sign-in accepts only this origin. |
EMAIL_TRANSPORT | smtp for any mail server, ses for Amazon SES, or none to send no email. |
With EMAIL_TRANSPORT=none, new accounts are verified at once, and invites and
password resets send no email. The comments in .env list the settings each transport
needs.
3. Pin a release
Set the image tag to a release, so a later pull does not change the version you run:
ACRUXCORE_IMAGE_TAG=2026.11.3
Each release has a tag such as 2026.11.3, and a
GitHub release with upgrade notes.
Without this line, Compose uses latest.
4. Create the network and start
The stack joins an external Docker network named mynetwork, so a reverse proxy on the
same host can reach web. Create the network once, then start the stack:
docker network create mynetwork
docker compose pull
docker compose up -d --no-build --wait
--no-build makes Compose use only the downloaded images. It never compiles anything
on the server.
Point your reverse proxy at acruxcore-web:80 on mynetwork. The web container
forwards /api/ to the API, so one host name serves both the dashboard and the API. If
you want to reach the stack without a proxy, publish the port in a
compose.override.yml next to the Compose file:
services:
  web:
    ports: ['8080:80']
The stack also publishes Redis on 127.0.0.1:6379. If another Redis already uses that
port, set REDIS_PORT in .env to a free one.
Then create the owner account from the first-run link in
docker compose logs api, as in step 2 above.
Upgrade to a new release
- Read the release notes for every release between yours and the new one. They list new required variables.
- Back up the database. The API applies new migrations when it starts, and migrations are not reversed on a downgrade.
- Change
ACRUXCORE_IMAGE_TAGin.env, then run:
docker compose pull
docker compose up -d --no-build --wait
On the local file, add -f docker-compose.local.yml to both commands.
Run your own changes
To run a modified copy of AcruxCore, clone the
repository and add --build to the up
command. Compose then builds the three images from your checkout instead of downloading
them. CONTRIBUTING.md
covers running the apps from source without Docker.